| |
 JSatTrak JSatTrak |
|
||
| |
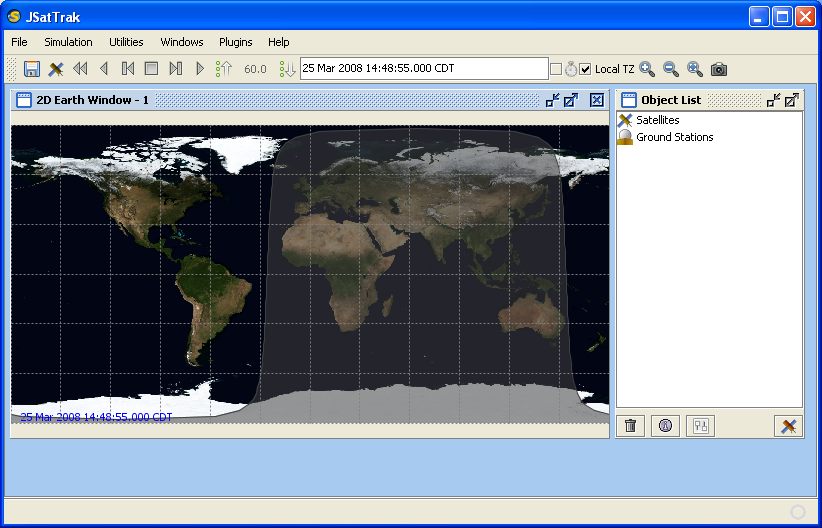
JSatTrak Turial - ISS Visible PassBy: Shawn GanoDraft 1: 17 April 2008 This tutorial will walk through the steps of calculating 10 days worth of visible passes of the International Space Station (ISS) for any location on Earth. (This tutorial was written using JSatTrack Version 3.1) 1) Start JSatTrak either from the webstart of one of the other options on the main JSatTrak site. 2) From the file menu select "close" to close the default scenario. (note: If you didn't use the web start, you will have already had the ISS added to your scenario by default, this tutorial will introduce how to add satellites so this step was done to make sure everyone starts from the same point). 3) Next we will open a new 2D window. To do this select "New 2D Window" from the Windows menu. Your app should look something like this:
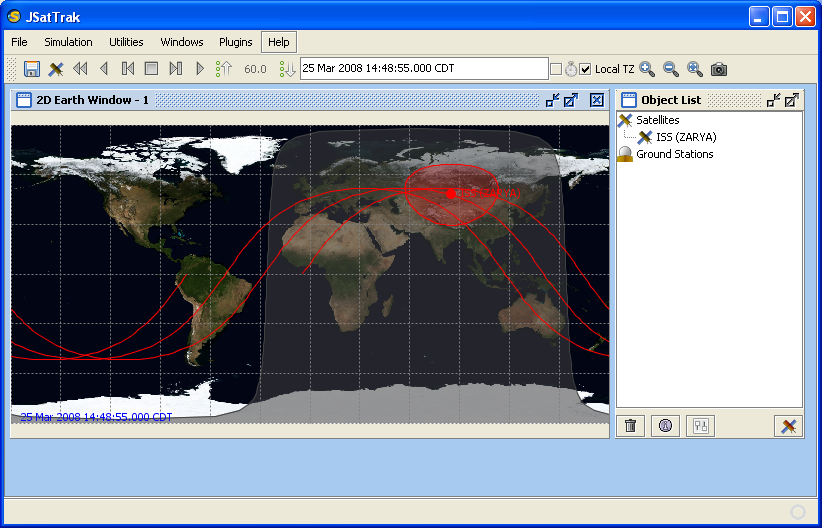
4) Next we want to update the orbital data (Two line Elements data), to do this select "Update Satellite TLE Data" from the Utilities menu and then push the "Start Download" button on the window that pops up. After the download is complete close the downloader window if it doesn't close automatically. (Note: if you started the app from using web start this step may not be necessary) 5) Next we will add the ISS satellite to our scenario. Choose "Satellite Browser" from the Windows menu (note: if using the web start you may be asked to directly download the TLE data, if so just hit the "yes??" button). After the Satellite Browser window opens, click on the + next to the Special-Interest Satellites category, and then click on the + next to the International Space Station sub category. Next, drag and drop the "ISS (ZARYA)" satellite from the Satellite Browser to the Object List. After the satellite is added to the scenario you will see it drawn on the 2D map. You can now close the Satellite Browser. Your app should now look similar to this:
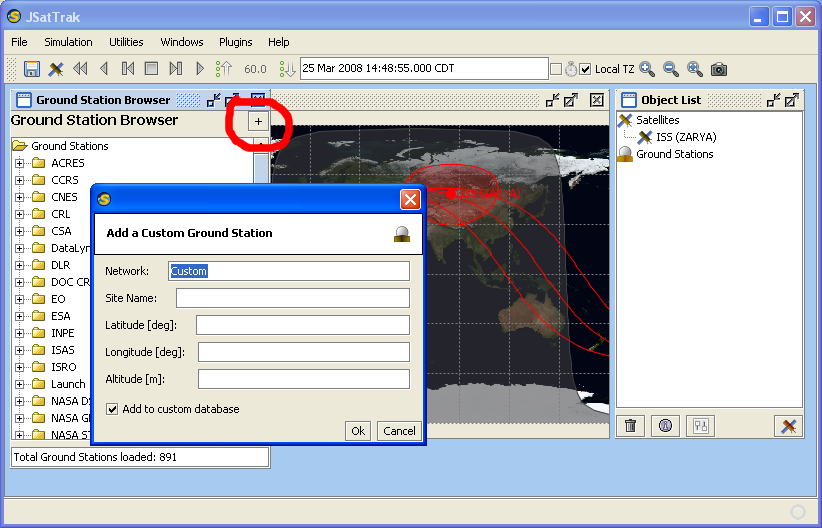
6) In this step we will add a ground location to the scenario; this location should be where you want to calculate the ISS visible passes from. Open the Ground Station Browser by selecting "Ground Station Browser" from the Windows menu. We now want to add a custom location so click on the button labeled with a + just to the right of the "Ground Station Browser" label in grey (see Screen 3 shot, below). Leave the network as Custom, but then give your site a name such as "my house", then your latitude and longitude in degrees (note: a West Longitude is negative). You can get your lat and long from Google maps. by first centering your location on a map and then pasting this line into the address bar of your browser: javascript:void(prompt('',gApplication.getMap().getCenter())); Next, enter your location's altitude above sea level in meters, if you don't know it guess or just put 0, then hit the Okay Button. In the Ground Station Browser drag your new location from the Custom category to the Object list to add the new site to the scenario. Once you do this you can close the Ground Station Browser. Your app should now look something like screen shot 4 shown below (my ground station is named Test).
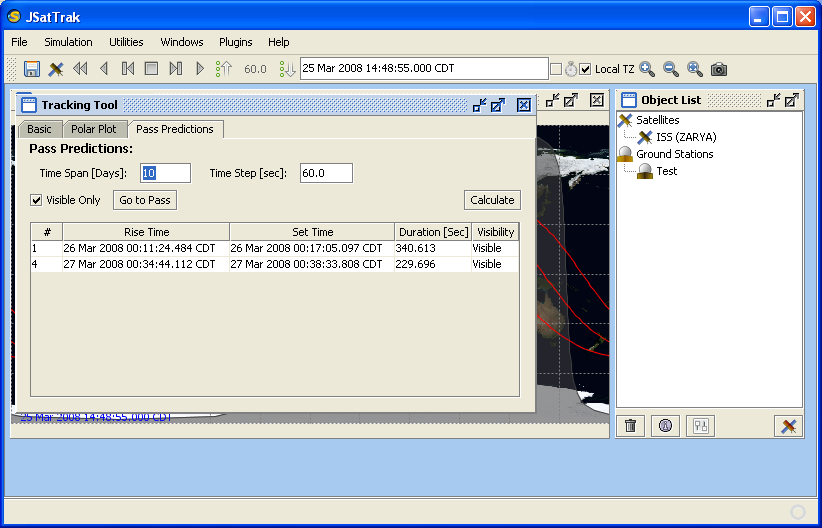
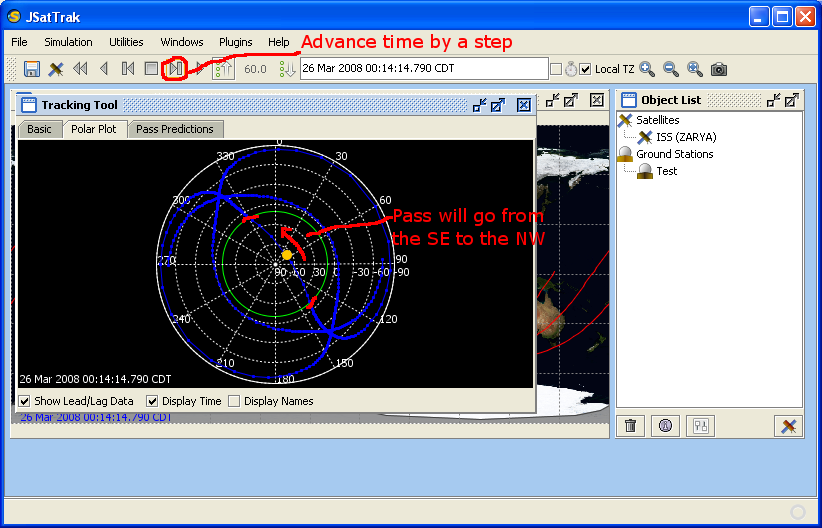
7) Now we are ready to do the pass prediction calculations. From the Utilities menu select "Tracking Tool", in the Tracking Tool make sure your ground station and satellite are both selected and then go to the "Pass Predictions" tab. Since we only want visible passes (meaning that we are in darkness and the satellite is still being lit by the Sun), check the "Visible Only" check box, and then hit the calculate button. A list of all the visible passes will be populated (if there are any for the next 10 days).
8) To get more information about a pass, select it in the list and hit the "Go to Pass" button, this will advance the scenario time to the point when the satellite is highest in the sky. Using the polar plot on the "Polar Plot" tab, you can see the direction in which you should look in the sky (anything in side the green circle is above the horizon, 0 is north, 90 is East, etc.), you might also want to advance the time by a step or two to determine the direction the pass will start and end.
|
|
|